How Still Images Become Moving Scenes: a Look at Image-to-Video Technology
From a Single Frame to a Fluid Clip
Think of a photograph you took last year. Maybe it was a friend laughing, a pet mid-step, or a landscape at sunset. Now imagine that same image coming alive: the friend's hair lifting in a breeze, the pet finishing its stride, clouds drifting across the sky. That is the promise of image-to-video generation. Instead of shooting minutes of video, you start with one still and let an AI model fill in the motion, the timing, and often the sound.
Over the past two years, this capability has moved from research papers into tools that anyone can try. The core idea is straightforward: a model learns how objects move, how light changes, and how scenes flow from frame to frame. It then extends a single input image into a short video clip that feels natural. But making that transition smooth and believable is where the real challenge lies.
How the Model Sees Motion
Most modern image-to-video systems work by treating the input image as the first frame of a sequence. The model then predicts what the next frames should look like. This process involves understanding the content of the image, identifying which elements are static and which might move, and generating new pixels that respect the original composition.
A key concept here is temporal coherence. The model must ensure that a person's face does not change identity between frames, that a car stays the same color as it moves, and that the background does not warp unnaturally. Without this consistency, the output looks like a series of glitchy stills rather than a video. Good models achieve temporal coherence by using architectures that track features across frames, such as attention mechanisms that link pixels in frame one to their counterparts in frame five.
Another important technique is frame interpolation. Some tools generate a small number of key frames and then fill in the gaps. This approach reduces computational load while still producing smooth motion. The trade-off is that if the model guesses the intermediate frames poorly, the result can appear jerky or blurry. Better models combine interpolation with direct frame generation, creating a hybrid workflow that balances speed and quality.

Motion Consistency and Visual Realism
One of the most noticeable issues in early image-to-video results was motion inconsistency. An object might start moving left, then suddenly reverse direction, or a person's expression might flicker between emotions. This happens because the model sometimes loses track of the object's state across frames. Modern systems address this by conditioning the generation on motion vectors or optical flow maps, which describe how each pixel moves from one frame to the next. By learning from these maps, the model can maintain smoother and more predictable motion.
Visual realism is another hurdle. Even if the motion is correct, the generated frames must look like they could have been captured by a camera. This means realistic textures, lighting, and depth. Models trained on large datasets of real videos learn these patterns, but they can still produce artifacts such as flickering or strange textures in areas with fine details like hair or leaves. Some tools now include post-processing steps that refine the output, reducing noise and sharpening edges.
For many users, the most impressive improvement has been the addition of cinematic audio. Some generators can now produce soundtracks or ambient audio that matches the scene, from the rumble of thunder to the chirp of birds. This audio is often generated by a separate model that analyzes the visual content and selects or synthesizes appropriate sounds. The combination of realistic motion and matching audio makes the final clip feel much more like a short film than a simple animation.
When evaluating an image to video ai tool, it is worth checking sample outputs for these qualities: does the motion stay consistent across the whole clip? Do objects maintain their identity? Is the audio in sync with what is happening visually? These criteria separate a polished experience from a rough prototype.
Practical Workflows for Creative Projects
Using image-to-video technology in a real project involves more than just uploading a photo. Most workflows follow a similar pattern. First, you choose a source image with good lighting and clear subject separation. A cluttered background or a low-contrast scene can confuse the model, leading to artifacts. Second, you may need to define the type of motion you want, such as slow camera pan, subject movement, or subtle environmental effects like rippling water. Some tools let you set a motion prompt or pick from presets.
Third, after the initial generation, you review the clip and decide whether to regenerate with adjusted parameters. Common adjustments include changing the motion intensity, the duration, or the audio style. Many creators generate several versions and pick the best one, then combine clips in a video editor to build a longer narrative. This iterative process is similar to how photographers bracket exposures or how illustrators sketch multiple drafts.
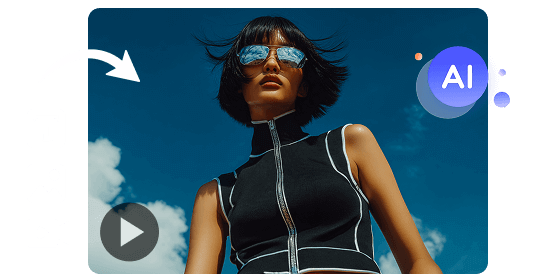
One common use case is social media content. A brand might take a product photo and turn it into a short looping video for a feed or story. The video grabs attention better than a static image, yet it requires far less production time than filming. Another use is in storytelling, where a single historical photograph can be brought to life for a documentary or educational piece. The technology also appears in game development and concept art, where artists generate quick motion previews of characters or environments.
Trade-Offs to Keep in Mind
No current system is perfect. Every model has strengths and weaknesses. Some excel at human faces but struggle with fast motion. Others handle landscapes well but distort complex objects. The choice of tool often depends on the subject matter. It is also worth noting that longer clips require more frames, which increases the chance of drift, where the scene slowly changes into something unintended. For this reason, many tools cap output at a few seconds, sometimes around five to ten seconds.
Another trade-off involves control. Some systems give the user almost no control over motion, while others offer fine-grained settings. More control often means a steeper learning curve. For a quick test, a simple one-click tool may be best. For a project with specific requirements, a tool with adjustable parameters is better.
The exact phrase "image to video ai" appears in discussions about the broader category of tools that convert stills to clips. As the field matures, the gap between these tools and professional video production narrows, but the need for thoughtful input and careful review remains. A great result still depends on a good source image and a clear idea of the desired motion.
What to Look for When Choosing a Tool
If you are trying a tool for the first time, here are a few things to keep in mind:
- Check the output length. Some tools produce only very short clips, which may be fine for social media but not for longer projects.
- Look at sample videos on the tool's site. Pay attention to motion consistency and whether the video feels smooth or jerky.
- See if the tool offers audio generation. If sound matters for your project, this feature can save a lot of post-production work.
- Consider the resolution and aspect ratio of the output. Some tools stick to square formats, while others support landscape or portrait.
- Read about the model's training data. Models trained on diverse video datasets tend to handle more subjects well.
Once you pick a tool, the best way to learn is to try it on different kinds of images. A portrait, a cityscape, and a close-up of a plant will each test different aspects of the model. By comparing results, you will quickly see where the tool excels and where it falls short.

The Road Ahead
Image-to-video technology is still evolving. Researchers are working on longer clips, better control, and more realistic motion. Some teams are exploring ways to let users edit the motion after generation, similar to adjusting a filter on a photo. Others are trying to reduce the computational cost so that high-quality generation can run on a phone or a laptop. As these improvements arrive, the line between a still image and a video will become even thinner.
For now, the technology offers a practical way to add motion to static visuals without a full production team. Whether you are a marketer, an artist, or just someone curious about what AI can do, the current generation of tools already produces results that are worth exploring. The key is to approach it with realistic expectations, experiment with different inputs, and enjoy the moments when a still image suddenly starts to move.